CookieScript provides one of the most configurable Cookie Banners on the market, which allows you to adjust your website's design and functions. You can modify your Cookie Banner design, color, texts, and functions.
To add a Cookie Banner to your website, perform the following steps:
- Sign up to the CookieScript account.
- Create a new Cookie Banner.
- Configure your Cookie Banner.
- Copy your Cookie Banner code and install it on your website.
Step 1. Sign up on the CookieScript account
First, sign up for CookieScript for free by entering your name, username, password, and email address, and create your Cookie Banner.
Step 2. Create a new Cookie Banner
When you sign in to your CookieScript account, on the Dashboard you can see your subscription plan. Here you can add your website and create a Privacy Policy for your website. You can add more than one website to your CookieScript account.
Watch this video tutorial or read the instructions below to learn about how to create a new Cookie Banner
The guide on how to create a new Cookie Banner.
Step 3. Configure your Cookie Banner settings
Watch this video or read the instructions below to learn about how to configure your Cookie Banner
Log in to your CookieScript account. Both on the left side and at the top of the website you can find these categories: Settings, Cookies, Scans, Scripts, Statistics, and Consents.
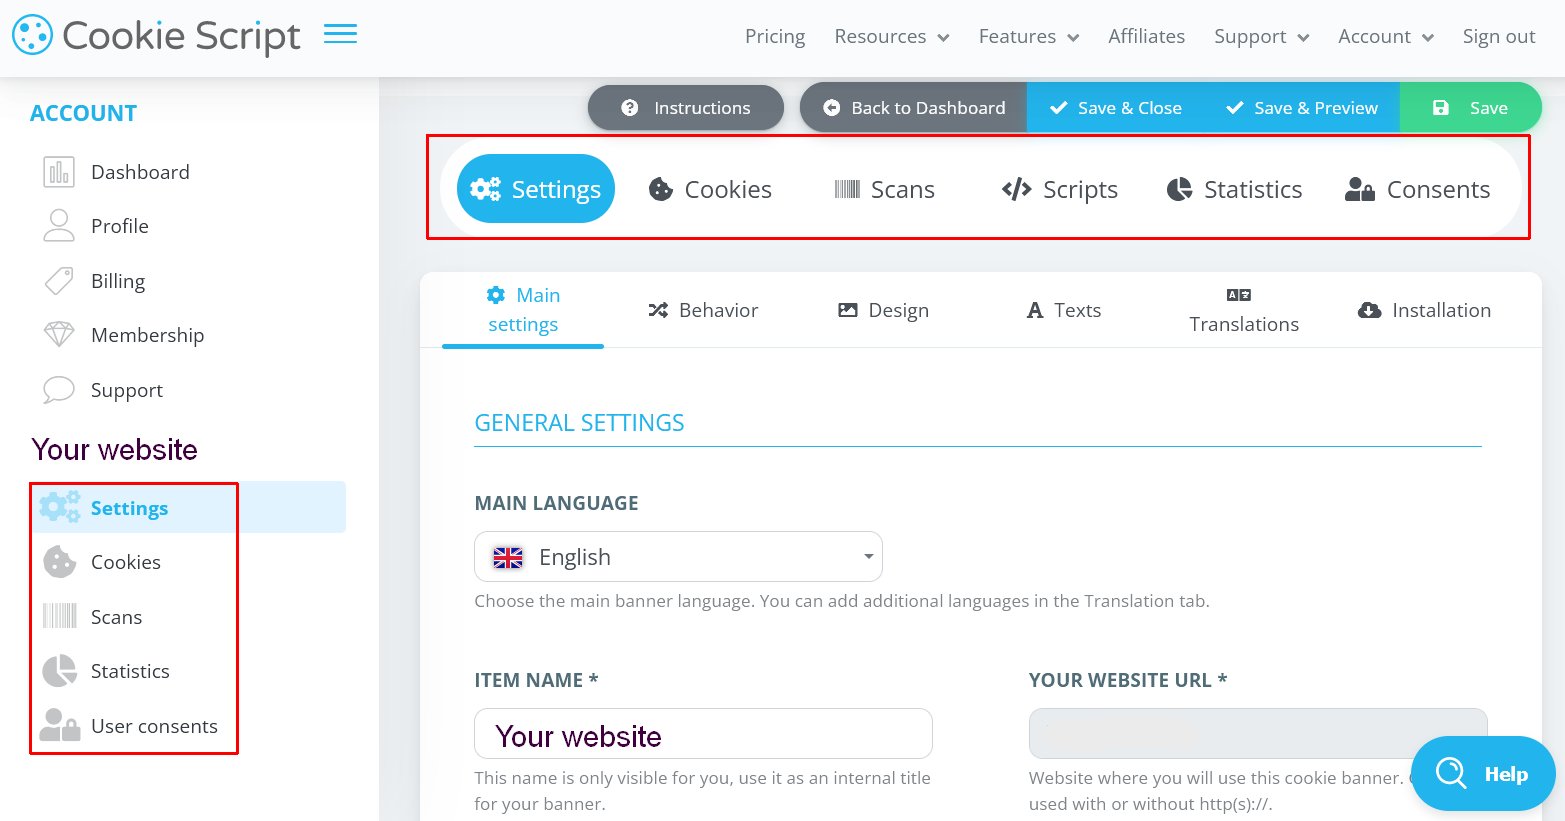
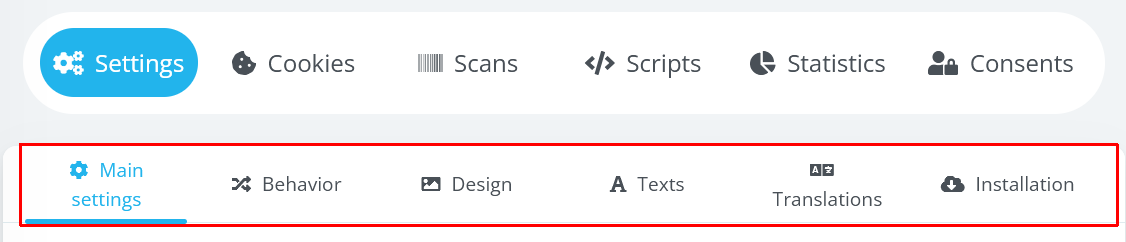
Click the Settings tab, found at the top left of the web page, and you will find six categories: Main settings, Behavior, Design, Texts, Translation, and Installation. Configure the settings for each of these categories, except Installation.
Under the Main settings tab, you can configure the main settings of your Cookie Banner such as main language, Cookie Consent mode, cookie declaration, cookie badge, Cookie Policy link, etc. You can also enable cookie statistics, IAB TCF 2.0, show or hide buttons "ACCEPT ALL", "DECLINE ALL, or" "SAVE AND CLOSE".
Under the Behavior tab, you can configure the behavior of your Cookie Banner such as details for showing and hiding your cookie banner, showing cookie categories, cookie control, Google Consent Mode, and the behavior of the banner depending on the user's choice.
Under the Design tab, you can configure the design of your cookie banner. You can configure the position of your cookie banner and cookie badge, change banner colors, opacity, texts, and colors of your cookie declaration, or add custom CSS styles.
Under the Texts tab, you can change the Category name and the Category description of the types of cookie categories, as well as the texts for the cookie declaration table and the IAB TCF 2.0 text.
In the Translation section, you can customize the language detection function of your cookie banner. You can also add a new language to your cookie banner by clicking Add New Translation button, and choosing a new language from the language drop-down list.
Read the guides below about the cookie banner settings, and how to configure them.
Main setting:
- Language configuration
- Explicit or implied cookie consent mode
- Record user consents
- Enable cookie statistics
- Enable IAB TCF 2.0
- Show the "ACCEPT ALL" button
- Show the "DECLINE ALL" button
- Show cookie categories
- Show cookie declaration
- Cookie badge
- Show cookie policy link
- Show close button
Behavior:
- Show banner only on the first page
- Reload the page after a user allows/rejects cookies
- Cookie categories pre-checked
- Setting up subdomains
- Custom Consent Expiration time
- Hide cookie banner automatically
- Encode CookieScript cookie value
- Auto accept cookies on scroll
- Enable Google Consent Mode
- Keep unknown cookies
- Enable Facebook Pixel Consent
- Accept cookies automatically after
- Strictly necessary cookies list
- Restore cookies before the page reload
- Keep Google Analytics Cookies
- How to set up random name cookies
- Enable Global Privacy Control
- Cookie declaration report
Design
- Cookie banner custom colors
- How to add custom styles to cookie consent banner
- How to change the order of the buttons
Texts:
Translations:
Also, read the guides about the banner configuration:
- Banner initialization delay
- Setting up subdomains
- Custom Consent Expiration time
- How to add custom styles to cookie consent banner
- How to set up random name cookies
- Cookie banner custom colors
- Automatic detection of special cookies
- How to change order of the buttons
- Auto accept cookie policy
- Allow special strictly necessary cookies
We have created privacy laws compliance checklist hints to help you create privacy laws compliant website. Basically, if you want your website to be GDPR compliant, select the option that shows the hint “GDPR compliant”, marked in green. If you see the hint “not GDPR compliant”, marked in red, it means that your Cookie Banner will not be GDPR compliant, so consider changing your selection.![]()
Step 4. Copy your Cookie Banner code and install it on your website
Copy your cookie banner code from the CookieScript account
When you customized your cookie banner settings, CookieScript automatically generates a code, which will show a cookie banner and also control cookies on your website.
COOKIE BANNER CODE. Go to CookieScript user account > Settings > Main settings > Installation, where you will find your cookie banner code. To copy your cookie banner code, first, select one of the options from the geo-targeting.
Select global geo-targeting, if you want your cookie banner to be shown for all website users, independently of their countries of origin.
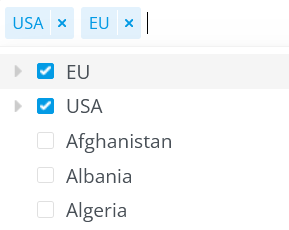
Select custom geo-targeting, if you want to show your cookie banner for website users from specific countries. For example, from a drop-down list, you can select, that your cookie banner will be shown for users from USA and EU.
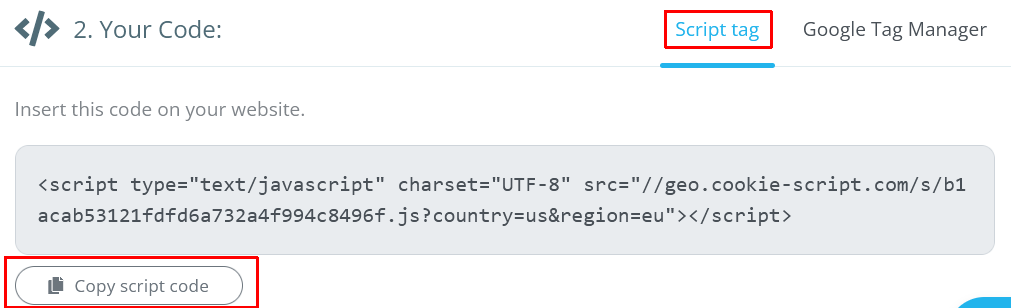
Second, copy your code. Here you have two options. Under the Your Code section, check the Script tag tab at the top right, and simply press the Copy script code button below.
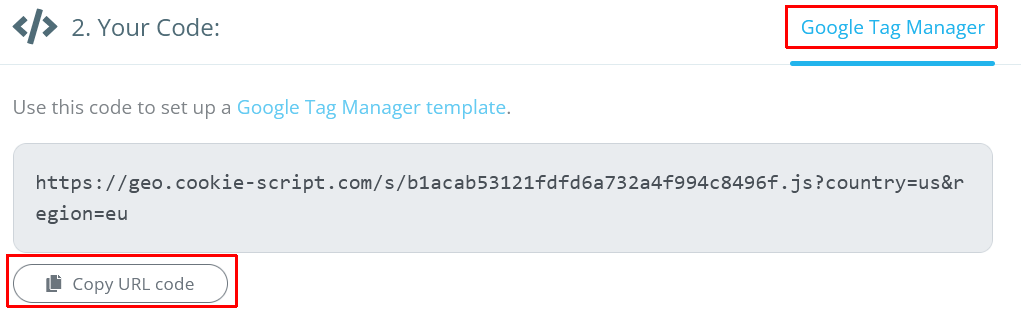
If you are using Google Tag Manager, check the Google Tag Manager tab at the top right, and then press Copy URL code button below.
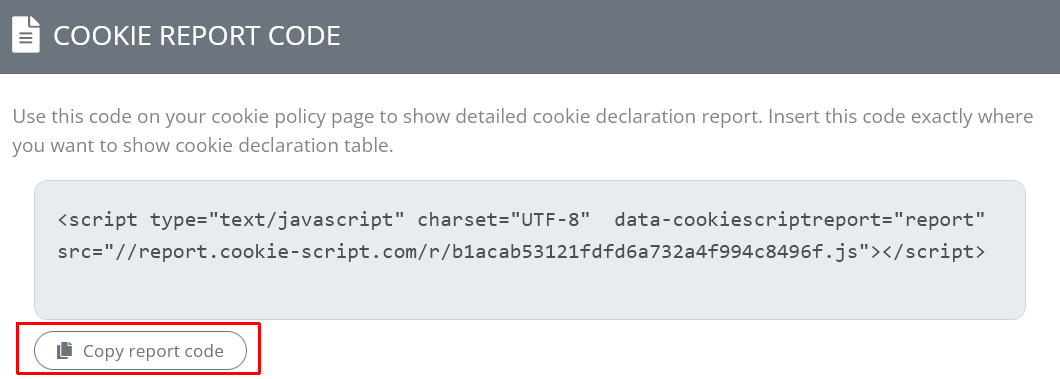
COOKIE REPORT CODE. Use this code on your Cookie Policy page to show a detailed cookie declaration report. Insert this code exactly where you want to show your cookie declaration table. Simply press the Copy report code button below.
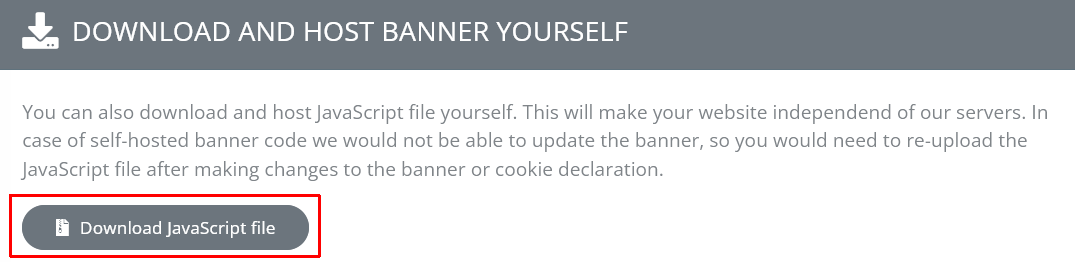
DOWNLOAD AND HOST THE BANNER YOURSELF. You can also download and host a JavaScript file yourself. This will make your website independent of our servers. In the case of self-hosted banner code, we would not be able to update the banner, so you would need to re-upload the JavaScript file after making changes to the banner or cookie declaration. To download the JavaScript file, simply press the download JavaScript file button below.
Install a cookie banner on your website
Paste your CookieScript installation code on your website. Add the code between the <head> and </head> tags of your website’s source code before any other script. This code should be inserted on every page where the banner should be shown. Save changes, refresh your website, and check if the cookie banner is active on your website.
We have also prepared integration instructions for the most popular systems. Choose your system to see exact integration instructions.
CookieScript Help Center
Check CookieScript help center to find out the answers to the banner configuration and installation related questions: